For this task you'll need:
Wing assembly is an incremental process. The riblets that will fit inside the D-box to stiffen it and give it torsional rigidity are first glued to the spar. This assembly is installed in the D-box shell. Finally, the main ribs and trailing edge are added to the completed D-box together with the carbon rib caps that tie the rear half of the wing together.
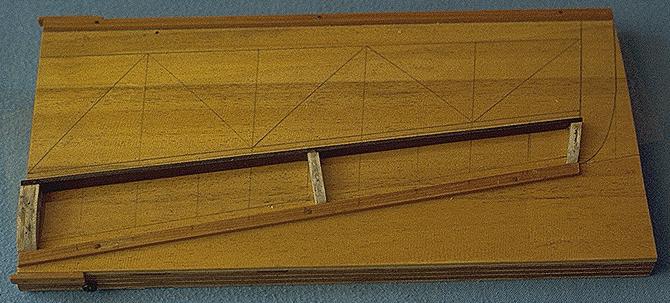
Start by gluing the front ribs to the spar with slow epoxy or thick cyano. This assembly is often called a 'fishbone' for reasons that are obvious once you've seen one. Make this assembly on your under surface jig using release film. This makes sure the structure has the correct warps built into it.
I use minimal numbers of ribs - one every 150 mm, but they are quite thick and are laminated from cross grained 1.5 mm medium balsa. The end ribs on a panel are five laminations and ribs in a panel are three laminations.
If you are making an F1A wing you should be aware that the torsion forces in the inner D-box are enormous and need careful feeding out through the root into the joiner. I make up a wide 'rib' by fitting two 5-way laminated ribs about 25 mm apart and then planking between them with hard 3 mm balsa.
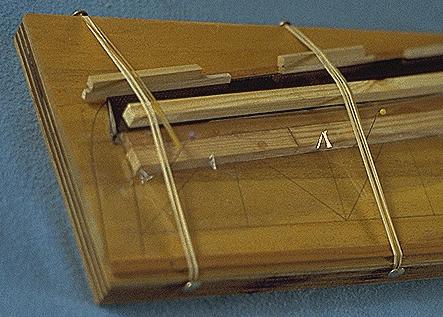
When the fishbone is assembled and the ribs sanded to shape you scuff up the contact areas inside the D-box shell and epoxy the fishbone into it. The assembly should be cured on the wing jig so it will match the required warps.
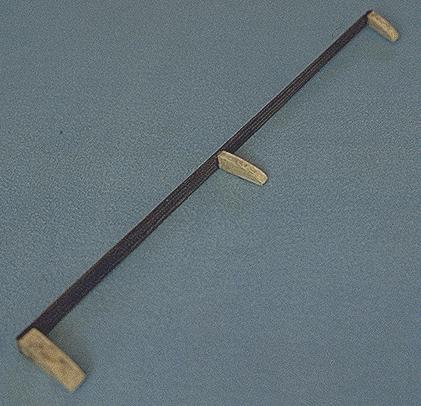
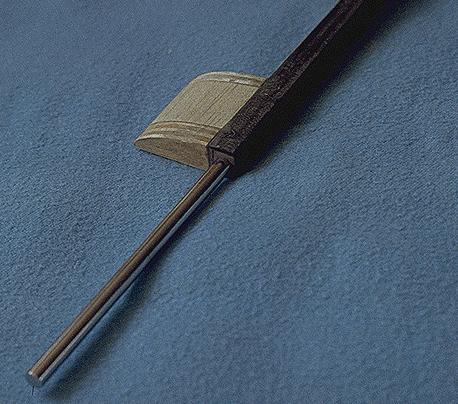
I use a 'pusher' to make sure the fishbone is properly positioned in the shell. This consists of a piece of wood as long as the panel and about 12 mm wide by 6 mm thick. One edge has foam door seal strip stuck to it and there's an 8 mm strip of 0.8 mm balsa stuck to the underside near the other edge.
In use the door seal strip is forced against the rear of the spar and the pusher held in place by pins driven into the wing jig. The balsa strip lifts the pusher out of contact with the lower D-box surface letting it 'lean over' the untrimmed rear of the shell and only touch the spar. The shell/fishbone/pusher assembly is held firmly down onto the wing jig with bands and strips of hardwood so the built-in warps in the jig will be built into the D-Box. It won't move once its set. The wood strips prevent the bands distorting the shell as well as providing a vertical load on the spar/shell joints.
After the epoxy has cured the D-box is taken off the wing jig and the shell is trimmed and sanded to remove all excess shell behind the spar and outside the end ribs. I tend to leave a generous amount of overlap on the D-box. I start by trimming this using a carbide cutting wheel on the Dremel and finish the job with a coarse Permagrit sanding block. This operation generates a lot of carbon dust, so use your extractor fan and wear a mask.
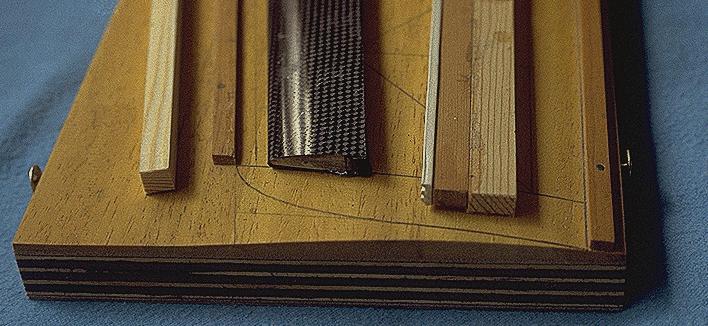
I use the 3M Spraymount, double sided tape and release film when assembling the TE and ribs to the D-box. All joints are made with thick cyano. The tape goes on the wing jig along LE and TE to hold the film down. Then dust on Spraymount (not too much). Now you can just put the lower carbon rib caps in place, cyano the points where they overlap onto the D-box, and drop the D-box into position. Everything is held where you want it by the Spraymount. Repeat with the TE. Now you cyano the ribs in, and sand the upper surface to its final shape with the T-bar. In the following picture the tip block has been dropped into place. It should not be glued in place until the ribs have been sanded to shape and the top capstrips added.
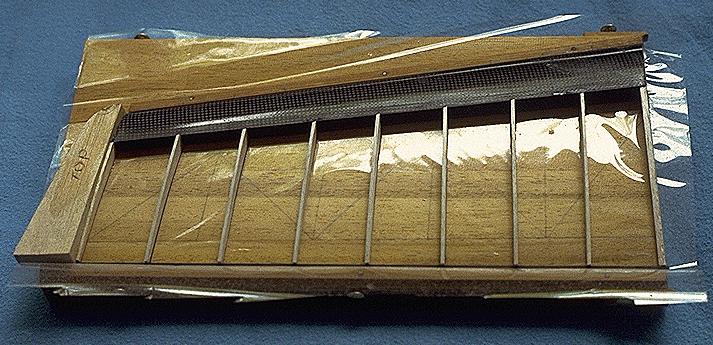
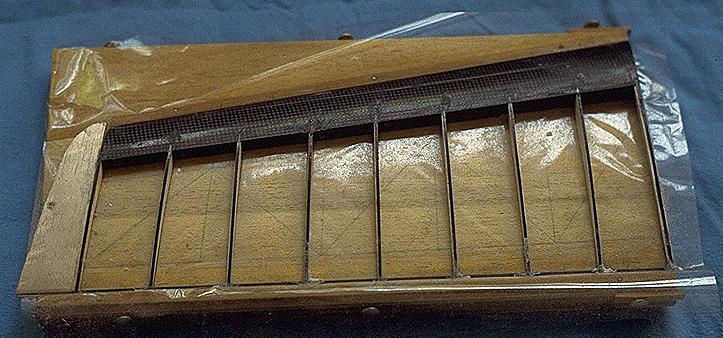
Now cyano on the upper capstrips. I hold the ends with masking tape while the cyano is setting. You will get a neater job if you chamfer the front of the cap strips before gluing them on. You need to sand them anyway to remove release agent and assure good adhesion. The cap strips should overlap the TE completely (they are all that holds it on) and overlap the D- box by around 5 mm. The following pictures shows the panel after adding the top cap strips and partially shaping the tip block..
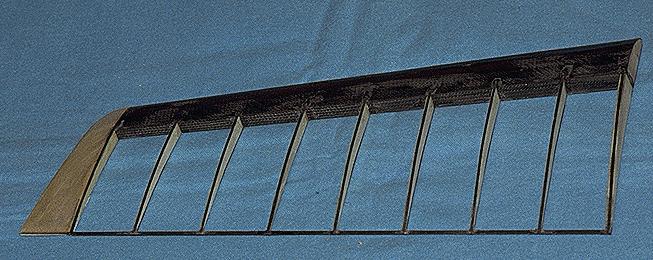
As you can see, I use 3 mm medium ribs at the dihedral joint on each panel and the rest are 1.5 mm medium balsa. The only exception is for F1A root ribs, which have to take a lot of load from handling and from the rear joiner pin. The basic ribs are 3 mm at the root and 1.5 mm at the next station in. Both ribs are reinforced with 0.4 mm ply. 1.5 mm planking is fitted between them once the rear joiner pins have been installed. When the cyano is good and set you can pull the complete panel up off the film and clean it up ready for covering.
Removal is a brute force operation but the complete panel is strong enough to come off without damage.
My jig has a fixed batten along the LE so I can butt the D-box up against it (useful when putting the D-box onto the fishbone) and during final assembly. I have a removable metal strip at the TE. Its a big help to be able to take this off to sand the tops of the ribs.
All that's needed to complete the panel is to trim the rib caps back flush with the rear of the TE and do a bit of light sanding to fair the front end of each rib cap into the D-box.
I use balsa tip blocks to get an aesthetically pleasing tip shape and gain a little efficiency. These are added after the panel has been assembled but while it is still on the jig. I leave the TE long so it will extend to the outer edge of the tip block and rebate the block to let it in at the rear edge. Once the panel is off the jig the block is carved and sanded to shape so it blends in with the D-box. It is completed with a coat of dope, sanded to remove raised fibres, and a layer of 25 gsm glass cloth is doped on as the final finish.