
There are a number of possible ways to repair a damaged D-box. Which one is chosen depends on how badly it is broken:
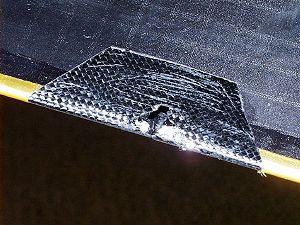
The model had hit a thermal pole on launch. Inspection showed that the leading edge and underside of the D-box had been fractured. Almost all the torsional stiffness had been destroyed and there was visible buckling at the damage site when the panel was twisted: the model was not flyable and was put away for later repair.
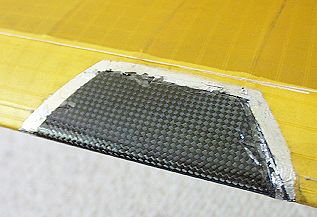
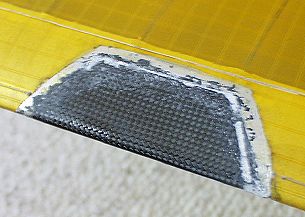
In these pictures the Ikarex covering and underlying aluminised Mylar have been removed to expose the carbon structure. You can see a top surface crack extending for more than half the D-box chord and along the leading edge. There's also an area of shattered and missing carbon on the under side, so it was necessary to replace a section of the D-box with a new section.
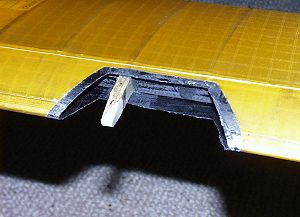
After the exposed carbon had been removed it was apparent that the rib had been damaged, so additional material was removed from the D-box and the rib was repaired. I used a Dremel cut-off wheel to remove the damaged section. The shape is not critical but the chordwise edges should be angled as shown unless the edge overlays a rib. Replacement D-box shell material came from a less than perfect D-box shell I had made previously. Never throw your failures away: they will come in handy later. Narrow sections were cut from a discarded D-box and epoxied inside the edges of the hole to form an inset lip. This will support the replacement shell section and provide structural integrity. These sections should be 4-5 mm wide and must extend round all edges of the hole. They were glued in with 24 hour epoxy and clamped in place while the epoxy cured. Excess epoxy was carefully removed from the outer surface of the lips with a sharp knife. A replacement for the damaged shell section was cut from the discarded D-box. It was cut a little over size and carefully trimmed to the best possible fit over the lips and up close against the original D-box on all edges.
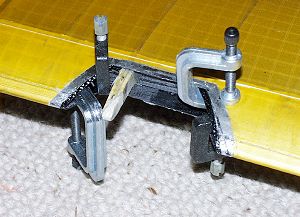
The replacement section was glued in with 24 hour epoxy. All the usual precautions must be taken to get good adhesion. I held the repair in place with masking tape over a small piece of release film. The wing was then strapped down on the jig it was built on to make sure that it would be straight when the epoxy had cured.
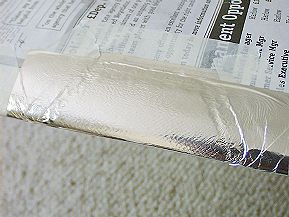
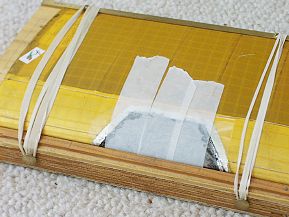
The repaired area was lightly sanded to remove excess epoxy. Small gaps round the edges of the section were filled with Polyfilla spackle and sanded to match the wing surface contour because such imperfections will show through the covering. The wing was masked off so only the repaired area was exposed, misted with 3M Spraymount and a piece of aluminised Mylar smoothed into place after the Spraymount had time to go tacky. The mylar patch must overlap the edges of the original mylar or the margins of the repair will be painfully visible when the repair is complete.
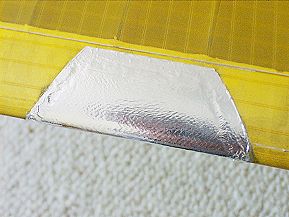
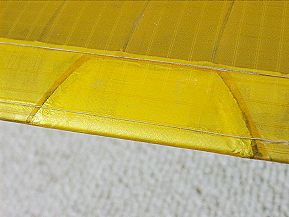
After a pause for the Spraymount to set up, the patch was trimmed to size and both excess mylar and the masking removed. The repair was covered with Ikarex patches attached with contact cement. Once this had set the margins were water proofed with dope and the Ikarex tightened with a heat gun. Finally, the missing piece of turbulator was doped on to complete the repair.
The following procedure works for pretty much all trailing edge repairs:
Its quite common for a tip impact or a landing on rocks to damage ribs without harming either the D-box assembly or the trailing edge. A rough landing may break the ribs off the back of the spar while a tip impact is likely to pop the trailing edge off several ribs. In either case the repair is made using the same approach as for a damaged trailing edge except that steps 2 and 3 are not needed.
If the spar is broken the rest of the panel won't be worth much either. Build another one.